
Worksheet
Package Slides at the River Landing
Use classroom package-slide tests to decide which designs slow a pushed block or turn it toward a target.
KindergartenScienceInteractive · Printable
Aligned toK-PS2-2
What’s included
- Single worksheet
- Auto-graded online
- 1 NGSS standard
- Printable answer key
- 8 questions
- Classroom-ready
Details
- Format
- Interactive · Printable
- Grade
- Kindergarten
- Subject
- Science
- Question types
- Multiple choice, Circle the answer, Short answer
About this worksheet
What students practice
- Students use observations to decide whether a design slows a pushed object.
- Students use observations to decide whether a design turns a pushed object toward a target.
How to use
Read the passage, test notes, and questions aloud. Use hand motions to show straight, right, and left. Let students explain choices using the test notes.
Curriculum
NGSS standard covered
Decide whether a design, such as a ramp, changes an object's speed or direction as intended with a push or a pull.
Preview
OwlSheets.com
Package Slides at the River Landing
Use test results to choose a design.
Check the Slide Tests
Listen to the test notes. Use them to answer each question.
A Model River Landing
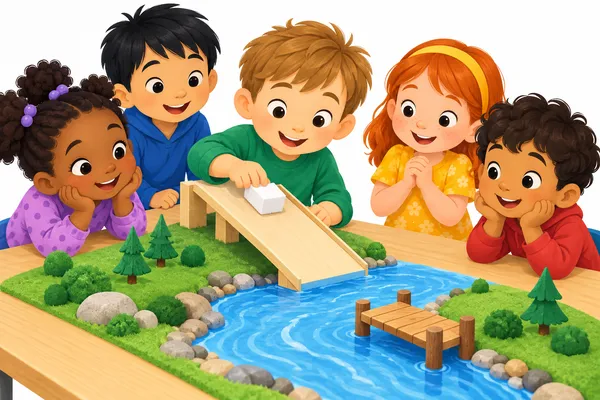
A class builds a model river landing on a classroom table. A foam block stands for a package. Children push it along a flat slide. They test a cloth strip, a smooth plastic strip, and a curved side guide. They change one part at a time. They use the same block, starting mark, and gentle push. They watch how fast the block moves and which way it goes.
Bare slide: The block moves fast and straight. It reaches the end.
Cloth strip on the slide: The block moves slowly and straight. It reaches the end.
Smooth plastic strip on the slide: The block moves fast and straight. It reaches the end.
Curved side guide: The block moves fast and turns right. It reaches the end.
- A. The bare slide
- B. The cloth strip
- C. The smooth plastic strip
- D. The curved side guide
The class used a foam block.The block on the cloth reached the end.The class used a starting mark.
- A. Use a bigger block and the new strip.
- B. Use a harder push and the new strip.
- C. Use a new starting mark and the new strip.
- D. Keep the block, start, and push the same.
- A. What happens with a bumpy strip?
- B. What happens with the cloth strip?
- C. What happens with the smooth plastic strip?
- D. What happens with the curved side guide?
Choose a Route
Keep using the test notes. Check each design against its goal.
- A. The smooth plastic strip
- B. The bare slide
- C. The curved side guide
- D. The cloth strip
- A. Yes. The block moved fast.
- B. No. The block turned right.
- C. Yes. The block turned left.
- D. No. The block went straight.
- A. Two smooth plastic strips
- B. A cloth strip and a smooth plastic strip
- C. A smooth plastic strip and the curved guide
- D. A cloth strip and the curved guide
Related worksheets
 Worksheet
Kindergarten
Snowy Pine Trail Sled Designs
Physical Science · K-PS2-2
Premium14 questions
 Worksheet
Kindergarten
The School Kitchen Path Test
Physical Science · K-PS2-2
Premium13 questions
 Worksheet
Kindergarten
Seed Shuttle by the Backyard Feeder
Physical Science · K-PS2-2
Premium13 questions
 Worksheet
Kindergarten
Playground Pretend Car Wash
Physical Science · K-PS2-2
Premium10 questions
 Worksheet
Kindergarten
Desert Sand-Art Cart Challenge
Physical Science · K-PS2-2
Premium12 questions
 Worksheet
Kindergarten
Pizza Counter Plate Helpers
Physical Science · K-PS2-2
Premium10 questions